
Table of Contents

Do you need to manage Active Directory from your Windows 11 PC? Then, you need to install RSAT for Active Directory on your Windows 11 computer.
In this guide, I will teach you three ways to install Active Directory on Windows 11. To give more details, I will show you how to perform this task from Manage optional features.
Also, you will learn how to enable Active Directory from DISM as well as Windows PowerShell. That said, with one of these three methods, you should be able to enable RSAT for Active Directory in Windows 11.
Just so you know, this guide also contains a Frequently Asked Questions section. This section is aimed at answering some other questions you might want to ask about RSAT, Active Directory, or Windows 11 in general.
How To Install RSAT For Active Directory In Windows 11 From Manage Optional Features

The first method I will teach you in this article is to install RSAT for Active Directory from Windows Settings. Follow the steps below to perform this task:
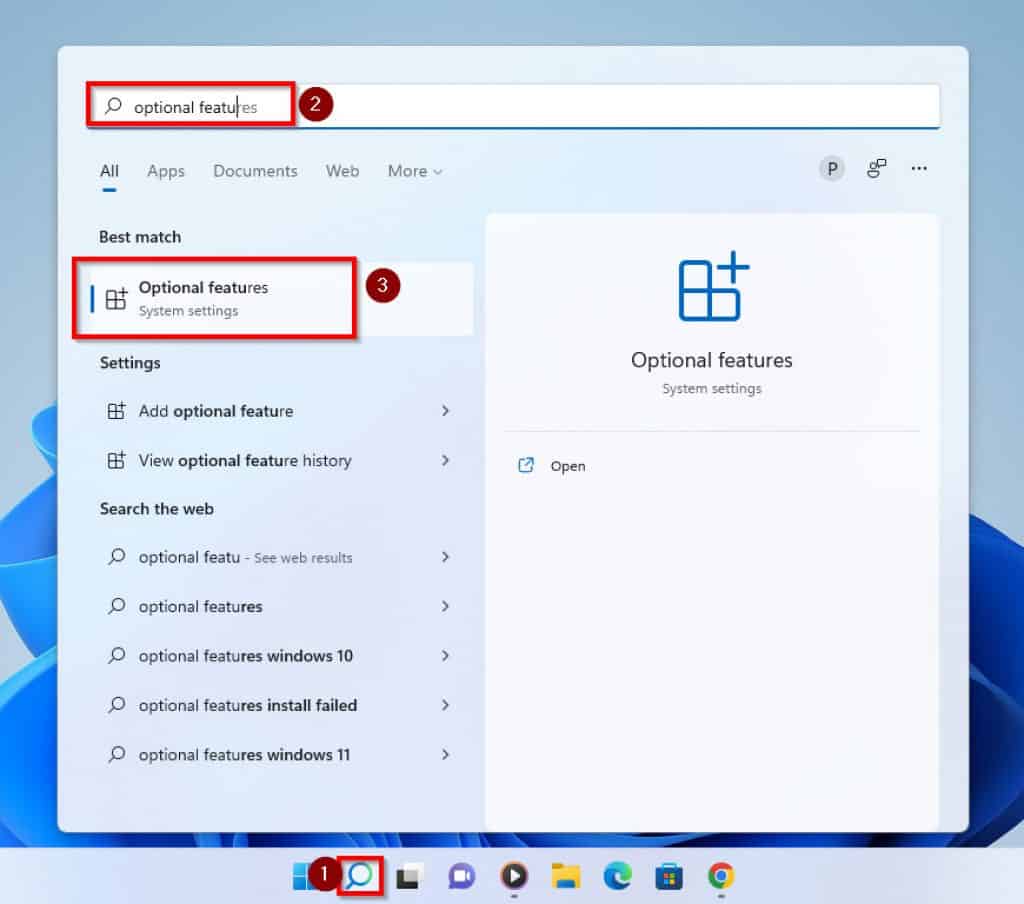
- To start with, click on the search icon on your Taskbar and type optional features. Then, from the result of your search choose Optional Features.
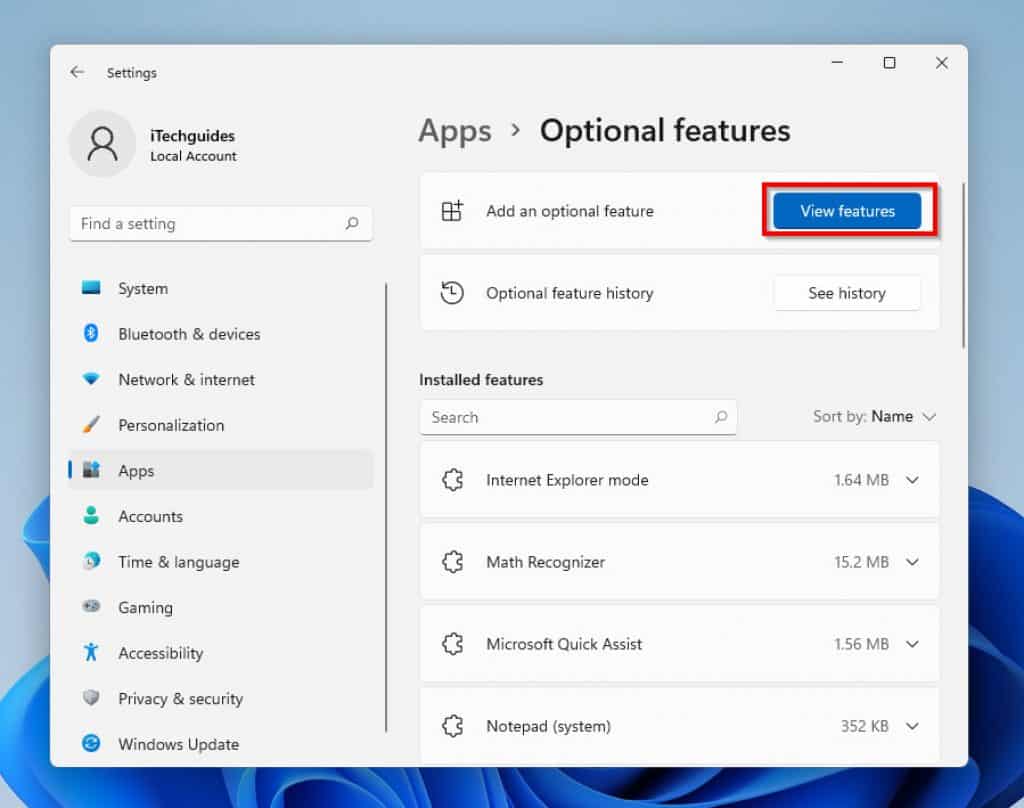
- When the Optional features settings screen opens, click on the View features button at the right pane of the page.
- Then, on the Add an optional feature pop-up screen, scroll down to the RSAT: Active Directory Domain Services and Lightweight Domain Services and select it.

- To install RSAT for this Active Directory in Windows 11, click on the checkbox next to the optional features. Then, click Next to proceed.

- Next, to download and install this optional feature click Install

Your PC will need to be connected to the internet for the download to be successful.
- You will be directed back to the Optional features menu, under Recent actions, you will see the progress of the installation.

- When the optional feature has been installed successfully, you will see Installed beside the feature you downloaded.

How To Install RSAT For Active Directory In Windows 11 With DISM

The second method I want to show is installing RSAT for Active Directory with the DISM command. Follow the steps below:
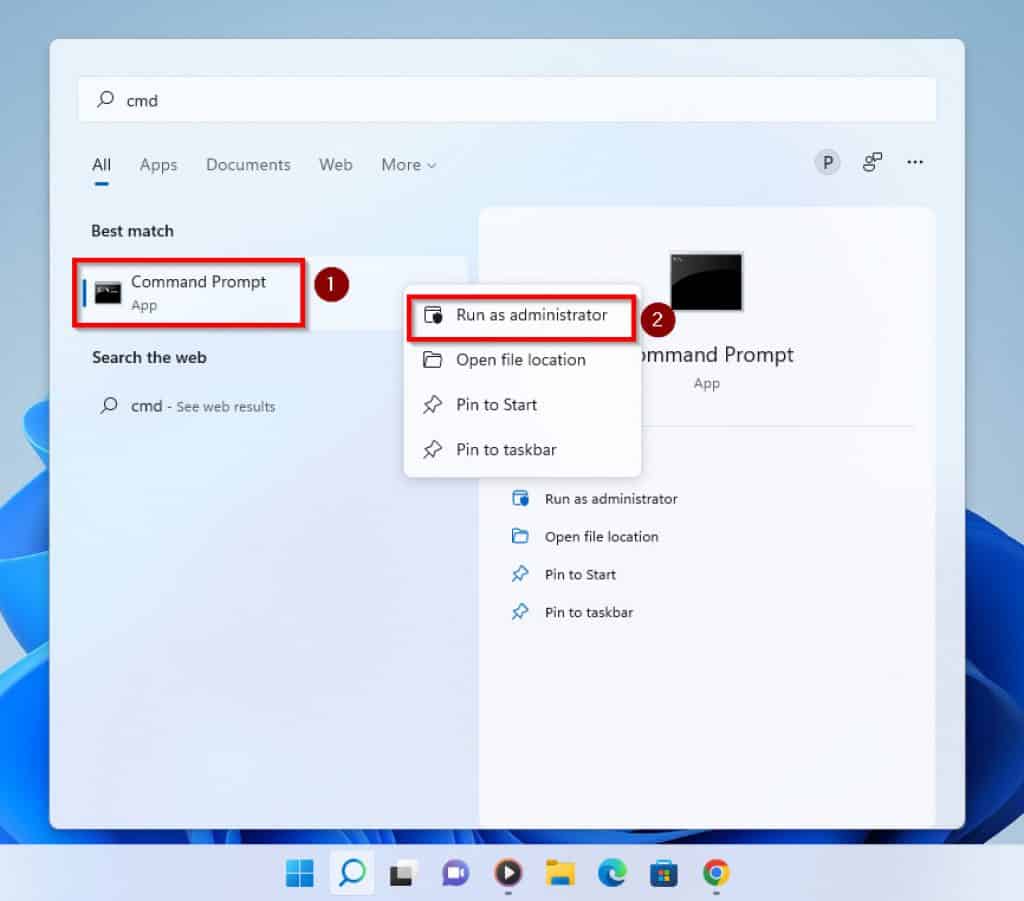
- First and foremost, click on the Windows 11 search icon beside the Windows start menu in the Taskbar. Then, on the search field, type cmd.
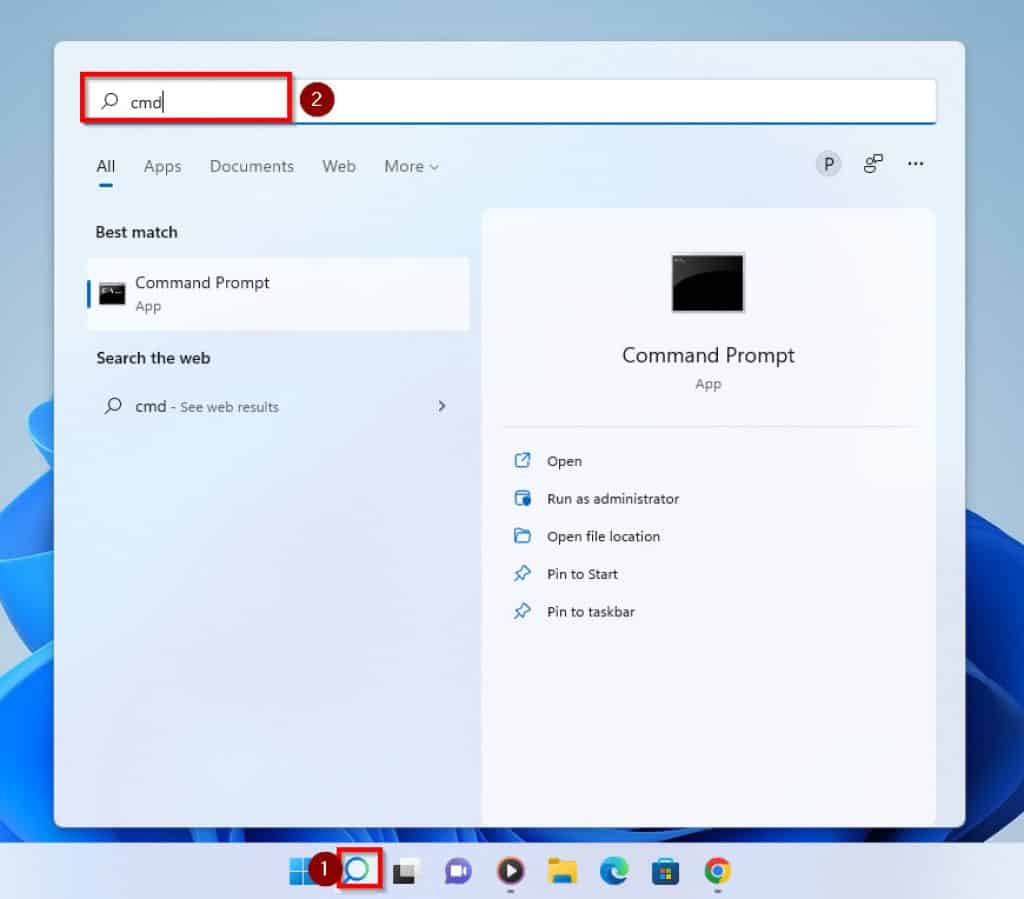
- Then, from the results of your search, double-click Command Prompt and click on Run as administrator.
- Next, you will receive a User Account Control prompt requesting you to grant Command Prompt to make changes to your PC. Click Yes to proceed.
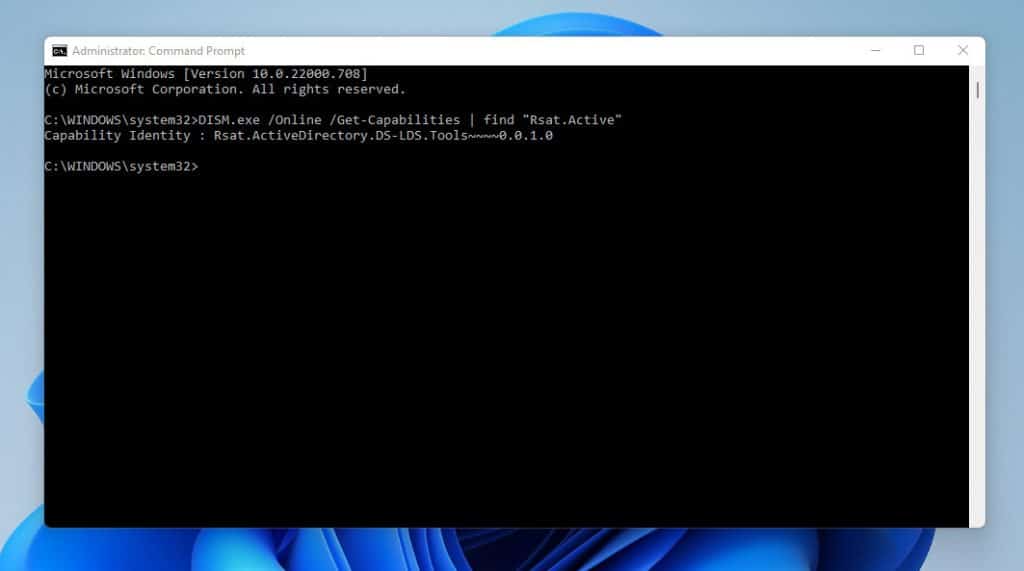
- When Command Prompt opens, type the command below and press enter to display the feature name for RSAT for Active Directory.
DISM.exe /Online /Get-Capabilities | find "Rsat.Active"
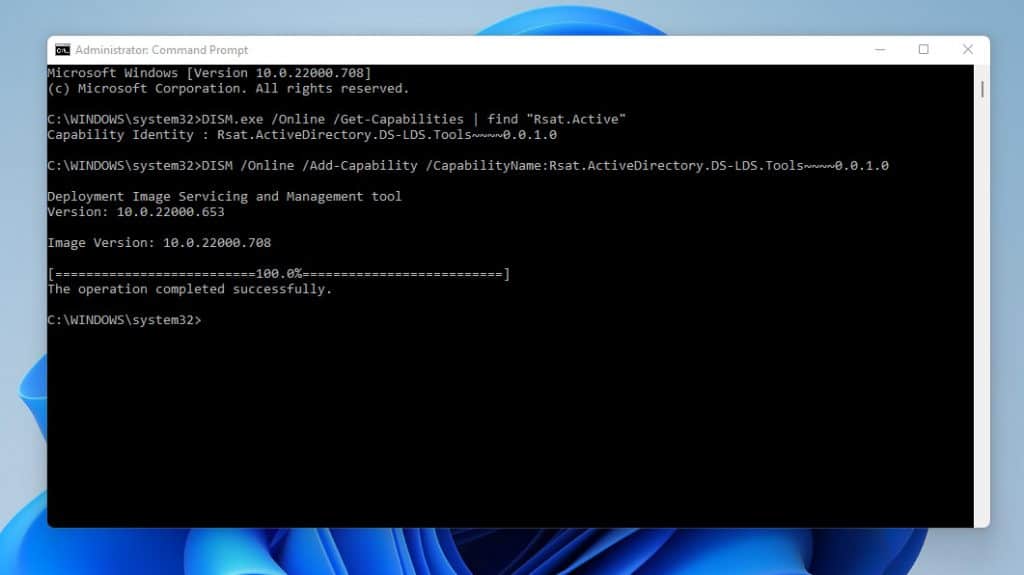
- Next, to install the Active Directory RSAT tools, type the command below and press enter.
DISM /Online /Add-Capability /CapabilityName:Rsat.ActiveDirectory.DS-LDS.Tools~~~~0.0.1.0
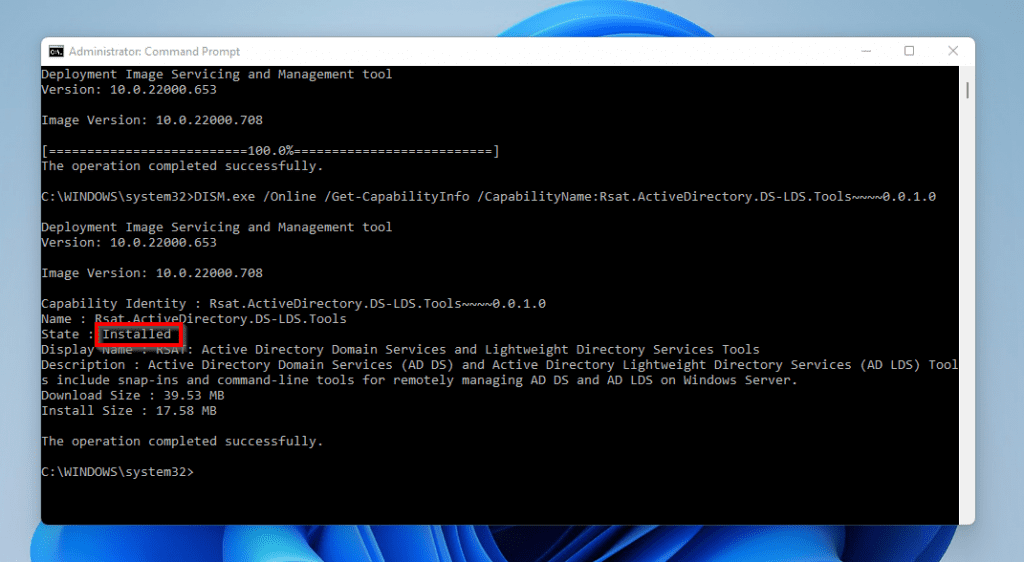
- To confirm that the installation was successful, type the command below and press enter. The command will display the State of the tool you installed.
DISM.exe /Online /Get-CapabilityInfo /CapabilityName:Rsat.ActiveDirectory.DS-LDS.Tools~~~~0.0.1.0
How To Install RSAT For Active Directory In Windows 11 With PowerShell

The third and final method I will be showing you in this guide is to install RSAT for Active Directory using Windows PowerShell. Follow the simple steps below to perform this task:
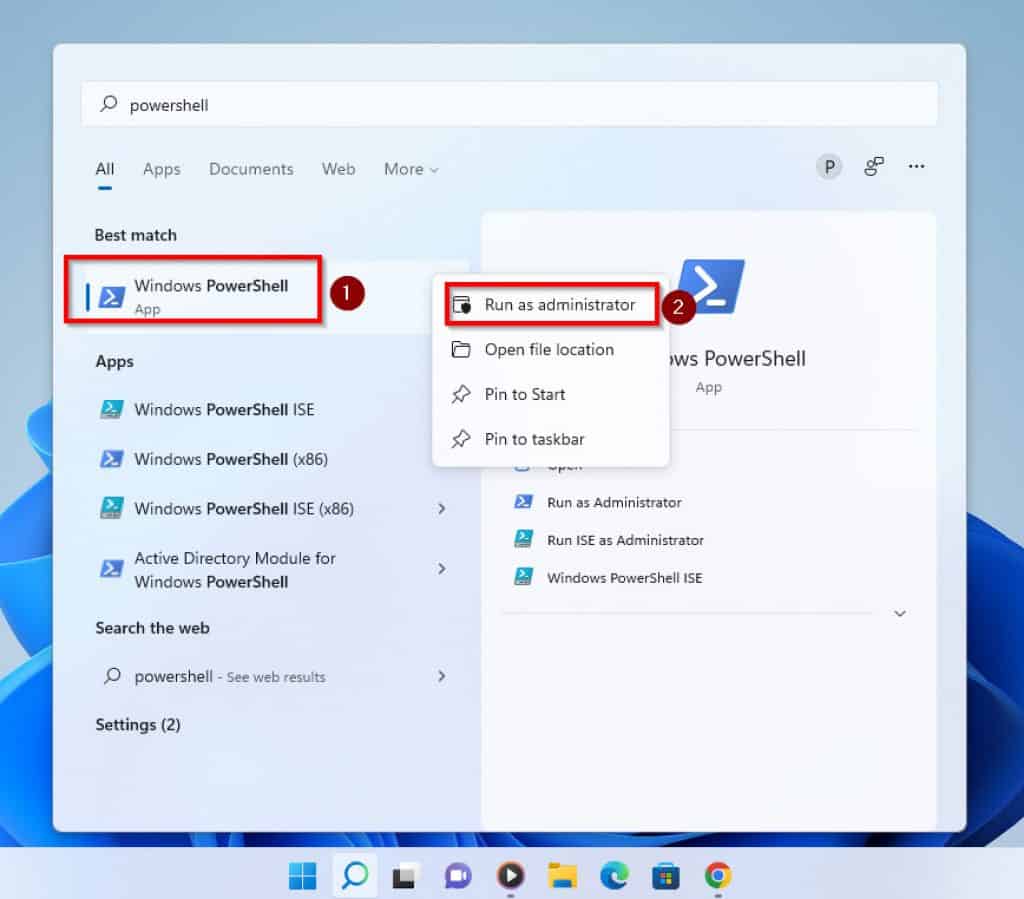
- Click on the search icon next to the Windows start menu on the Taskbar. Then, in the search box, type powershell.
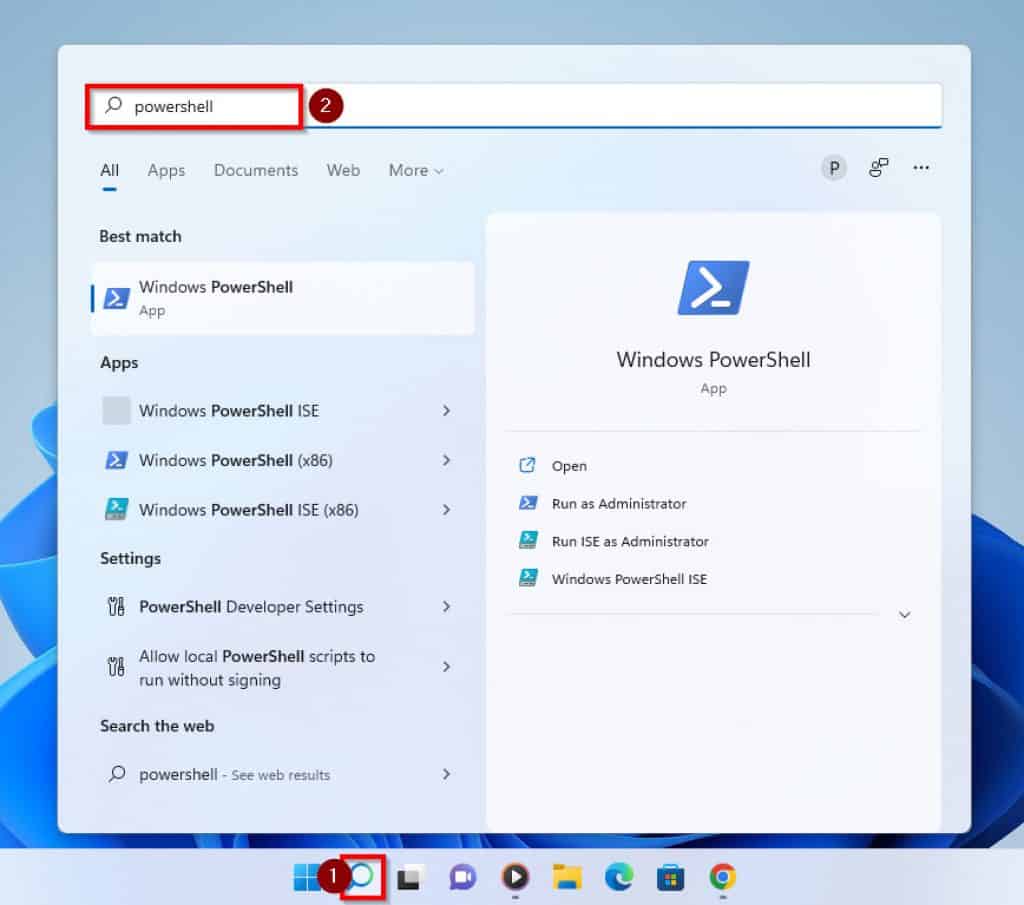
- Then, from the result of the search, double click on Windows Powershell and choose Run as administrator.
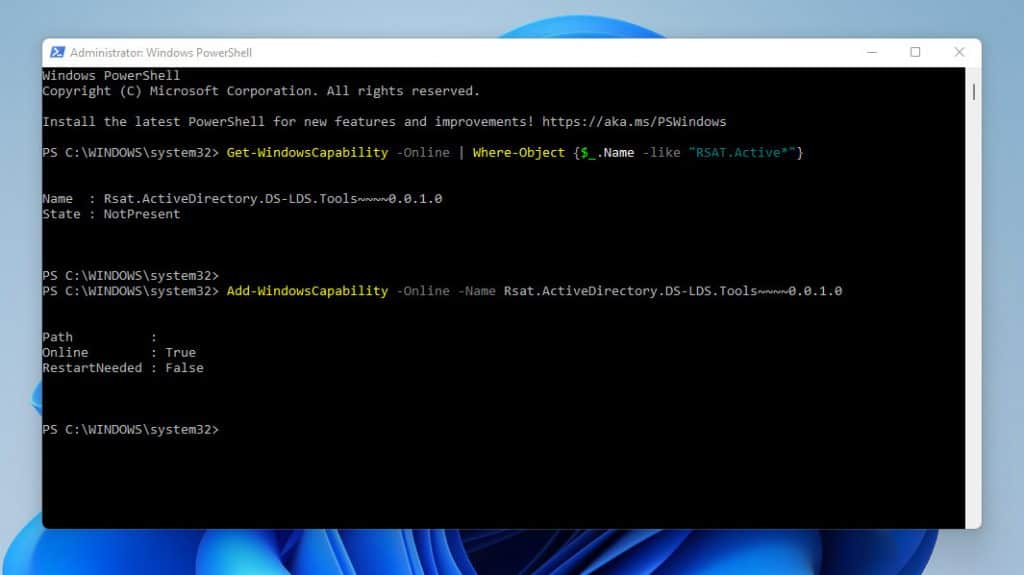
- In Powershell, type the command below and press enter to display the feature name of RSAT for Active Directory.
Get-WindowsCapability -Online | Where-Object $_.Name -like "RSAT.Active*"

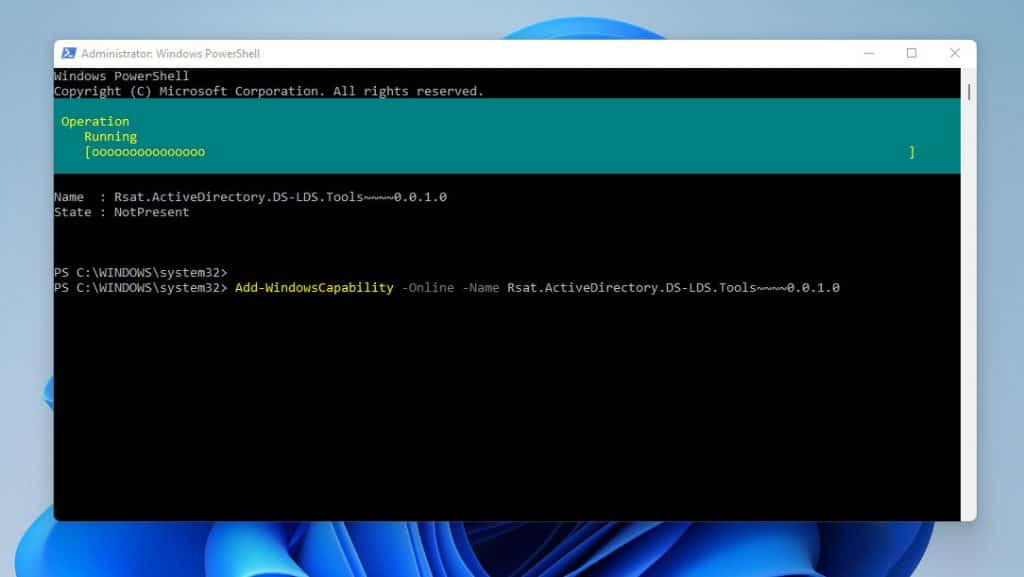
- Furthermore, to install the feature with PowerShell, type the command below and press enter. Copy and replace the name of the feature from the result of the previous command.
Add-WindowsCapability -Online -Name Rsat.ActiveDirectory.DS-LDS.Tools~~~~0.0.1.0
- When the installation is completed, if your PC needs a restart the RestartNeeded message will be true. Otherwise, it will be false.
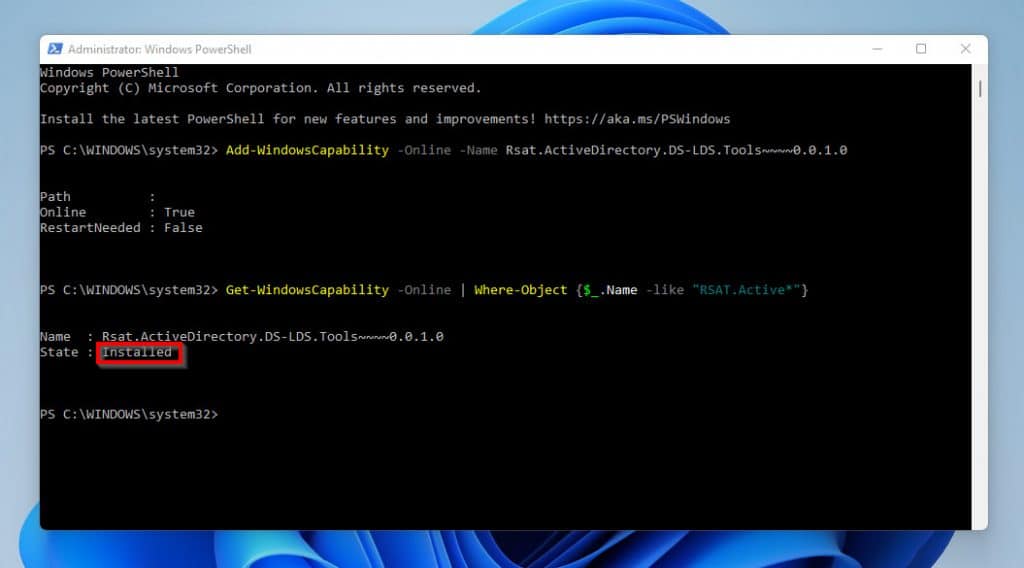
- Finally, to confirm that the installation was successful, type the command below and press enter.
Get-WindowsCapability -Online | Where-Object $_.Name -like "RSAT.Active*"
If you notice, the State shows installed. This implies that the installation was successful.
How To Enable RSAT For Active Directory In Windows 11: Frequently Asked Questions

No, Windows 11 is a client Operating System and does NOT have Active Directory. What Windows 11 offers a tool to manage Active Directory installed on a Windows Server.
The tool is called RSAT (Remote Server Administration Tool) for Active Directory
Once the feature has been installed, you will need to perform a search to find it. To begin with, click on the search icon -> type active directory in the search field -> then, from the results of your search click Active Directory Users and Computers.
RSAT is used by IT admins to manage the Windows server roles and features from a PC.
No, it is not. RSAT is a set of tools used to manage Active Directory installed on a Windows server.
Yes, it does. RSAT has a number of tools which include ADUC, Active Directory Administrative Center (ADAC), and Active Directory Module for Windows PowerShell.
How To Enable RSAT For Active Directory In Windows 11: My Final Thoughts

Active Directory as you might be aware is responsible for information storage and makes it easily accessible to administrators and users. This is made possible by a structured data store based on logic and organizational hierarchy.
Active Directory aids in organizing company users, computers, and lots more. Hence, this guide shows you three ways of installing RSAT for Active Directory In Windows 11.
To be more precise, this guide showed you how to install RSAT for Active Directory from Optional features settings. That’s not all, it also gave you steps to perform the task using DISM and Windows PowerShell.
Thus, with any of the aforementioned methods in this article, you will be able to enable Active Directory on Windows 11.
I hope this post was helpful to you? If the post was of any help to you, kindly vote Yes to the Was this post helpful? below.
Better still, let us know what you think about this guide by leaving a comment or feedback with the “Leave a Reply” form at the bottom of this page.
Finally, to get more Windows 11 guides and fixes, visit our Windows 11 How-To page.
