
Table of Contents
Have you at any time arrive across a recommendation like “add expires headers”? You are not alone if you have. It is one of the most normal web-site performance suggestions you are going to hear when you 1st get started optimizing your web site.
If you control a WordPress web-site, you’re probably usually wanting for new solutions to make your website a lot quicker. Introducing expires headers is 1 these kinds of alternative.
Expires headers are guidelines that tell world-wide-web browsers no matter if to load visuals from the visitor’s browser cache or your server. These can aid your web site operate more smoothly. You can possibly include expires headers manually or with the aid of a plugin.
This post will clarify what expires headers are and how they have an affect on your web-site. Also, we’ll clearly show you phase-by-phase procedures on how to add expires headers in WordPress.
To realize expires headers and how to use them in WordPress, you ought to initial fully grasp the browser cache. HTML, JavaScript, and CSS are examples of static data files that make up a website website page. Because these documents do not alter regularly, the identical information will be retrieved both of those moments if you ask for the web page yesterday and ask for it once again currently.
What if you saved all those information on your browser when you requested them yesterday? When you make today’s requests, people documents will be swiftly loaded from your browser somewhat than from the world-wide-web server, lowering useful resource use and escalating page loading occasions.
That would be appreciably a lot quicker, and caching accomplishes this.
On the other hand, the browser cache cannot continue to keep a website’s information (pictures, CSS, Javascript, and so on) indefinitely it needs to be instructed when to delete outdated kinds and ask for new types.
This is in which the expires header will come in. They are procedures specified in a website’s header part that suggest the browser to discard cached documents and fetch new copies.
You can use a plugin or edit your server files to increase expires headers to WordPress. The former is ideal for superior buyers given that generating a miscalculation when modifying your server information can crack a little something on your web-site. If you do not have a good deal of technical understanding, a plugin is much better.
2 How to Incorporate Expires Headers to Your WordPress Internet site?
2.1 Utilizing A WordPress Plugin
To empower expires headers on your web page, you can use the WordPress plugin. Whilst there are a lot of plugins to opt for from, caching plugins is an outstanding selection. This plugin enables browser caching and expires headers in just a number of clicks. Let’s have a seem at the steps with W3 Total Cache.
At 1st, put in and activate the plugin from Plugins > Increase New portion of your WordPress dashboard.

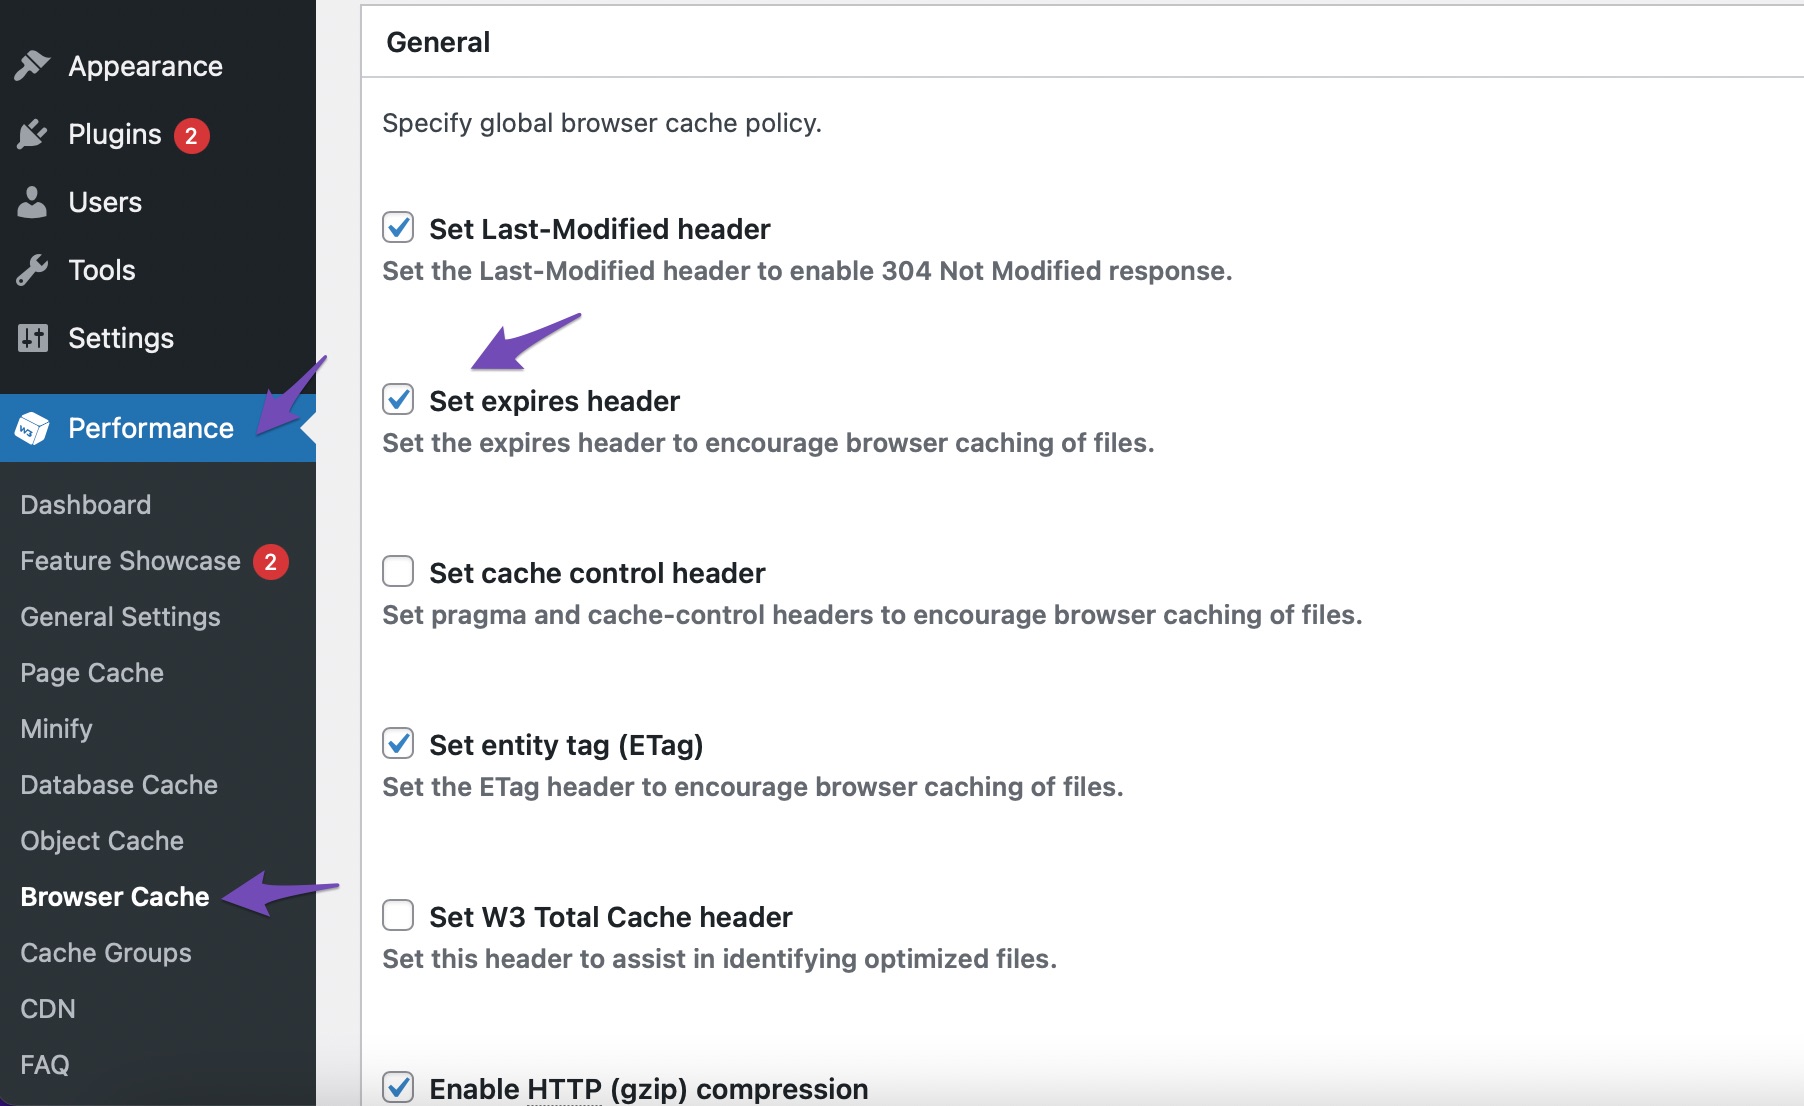
When you’ve activated the plugin, navigate to Functionality > Browser Cache. In the General sub-box, Check the alternative Set expires headers as shown down below.
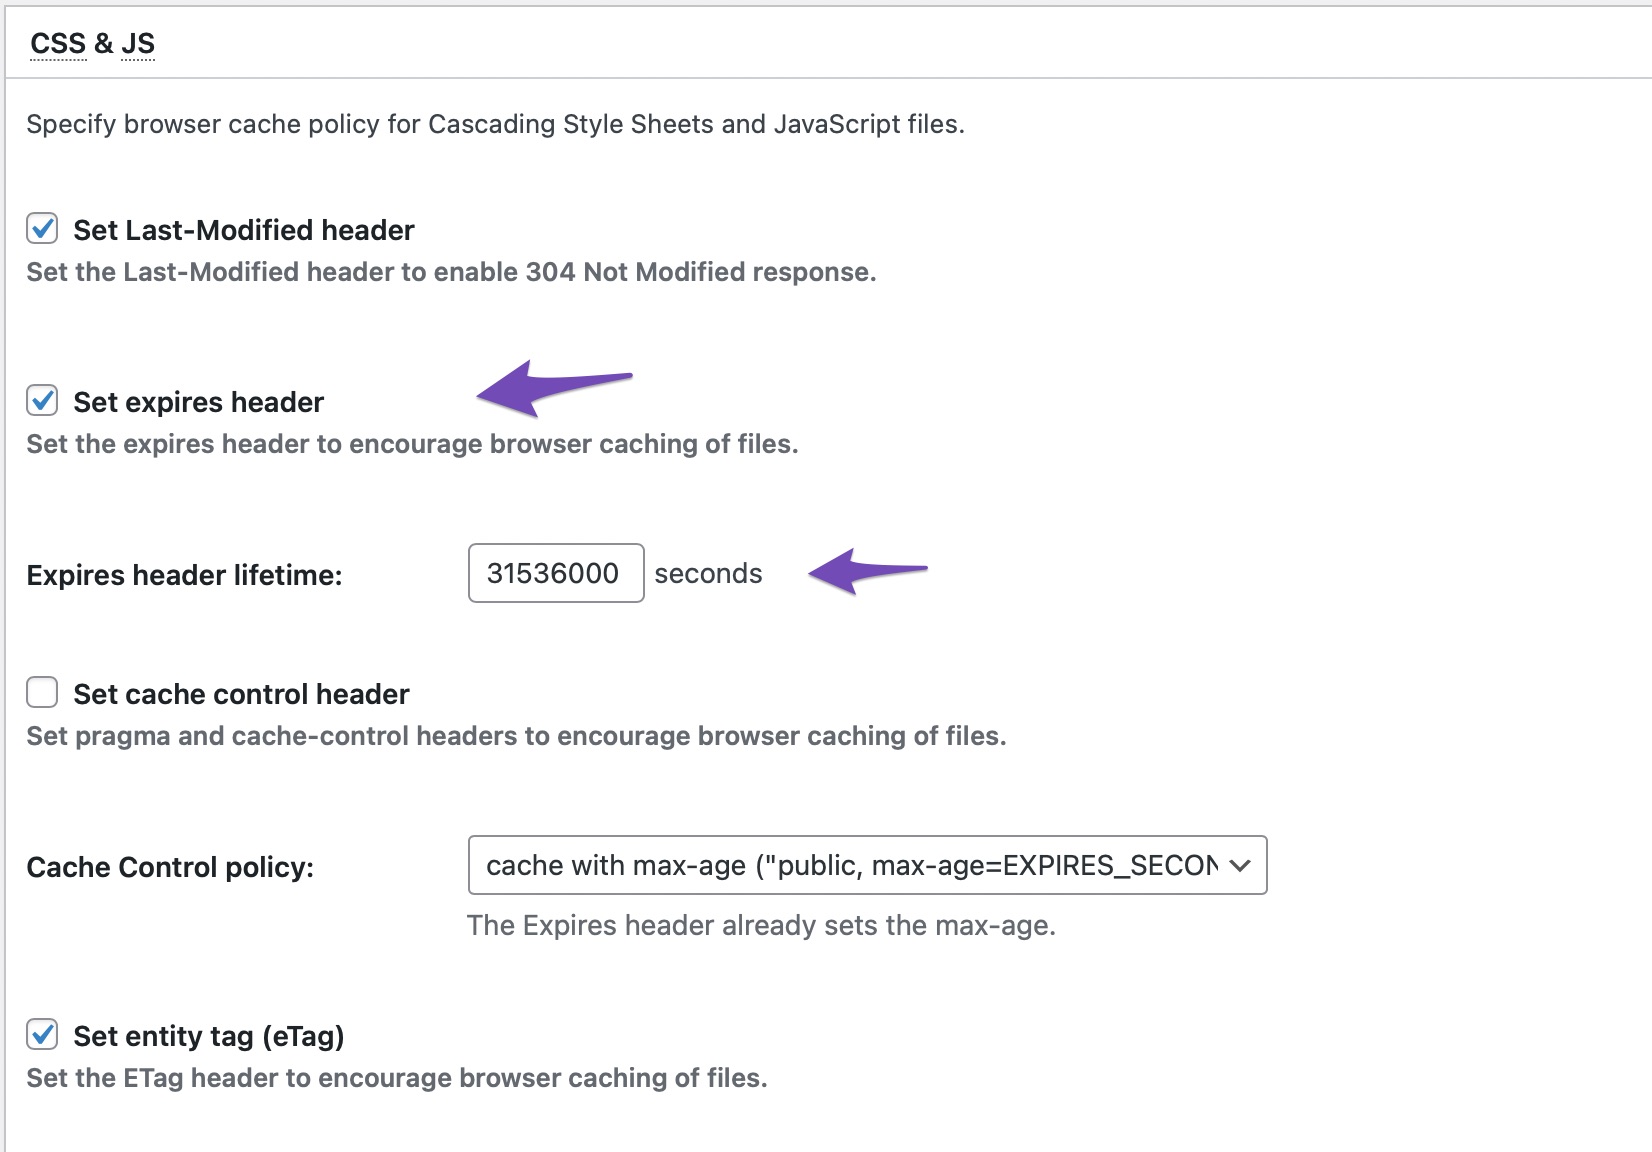
Now go to the CSS & JS segment and find the box up coming to the Set expires header, then enter your Expires header lifespan worth in seconds. By default, this number is established to 31536000 seconds or 365 days. This can be altered as needed.
Repeat the earlier mentioned step for the HTML & XML and Media & Other Data files sections. At the time carried out, click on on Save all options button.
2.2 Insert Expires Headers On An Apache Server
If your website host makes use of the Apache world-wide-web server, you can use the .htaccess file in the root folder of your server to incorporate expires headers.
Rank Math will make it exceptionally quick for you to edit your .htacess file right inside your WordPress dashboard. You can edit your .htaccess file by navigating to Rank Math > Normal Configurations > Edit .htaccess.
You can also edit the .htaccess file by connecting your server through your hosting panel with the enable of an FTP or cPanel. For simplicity, we will use the cPanel to establish the link.
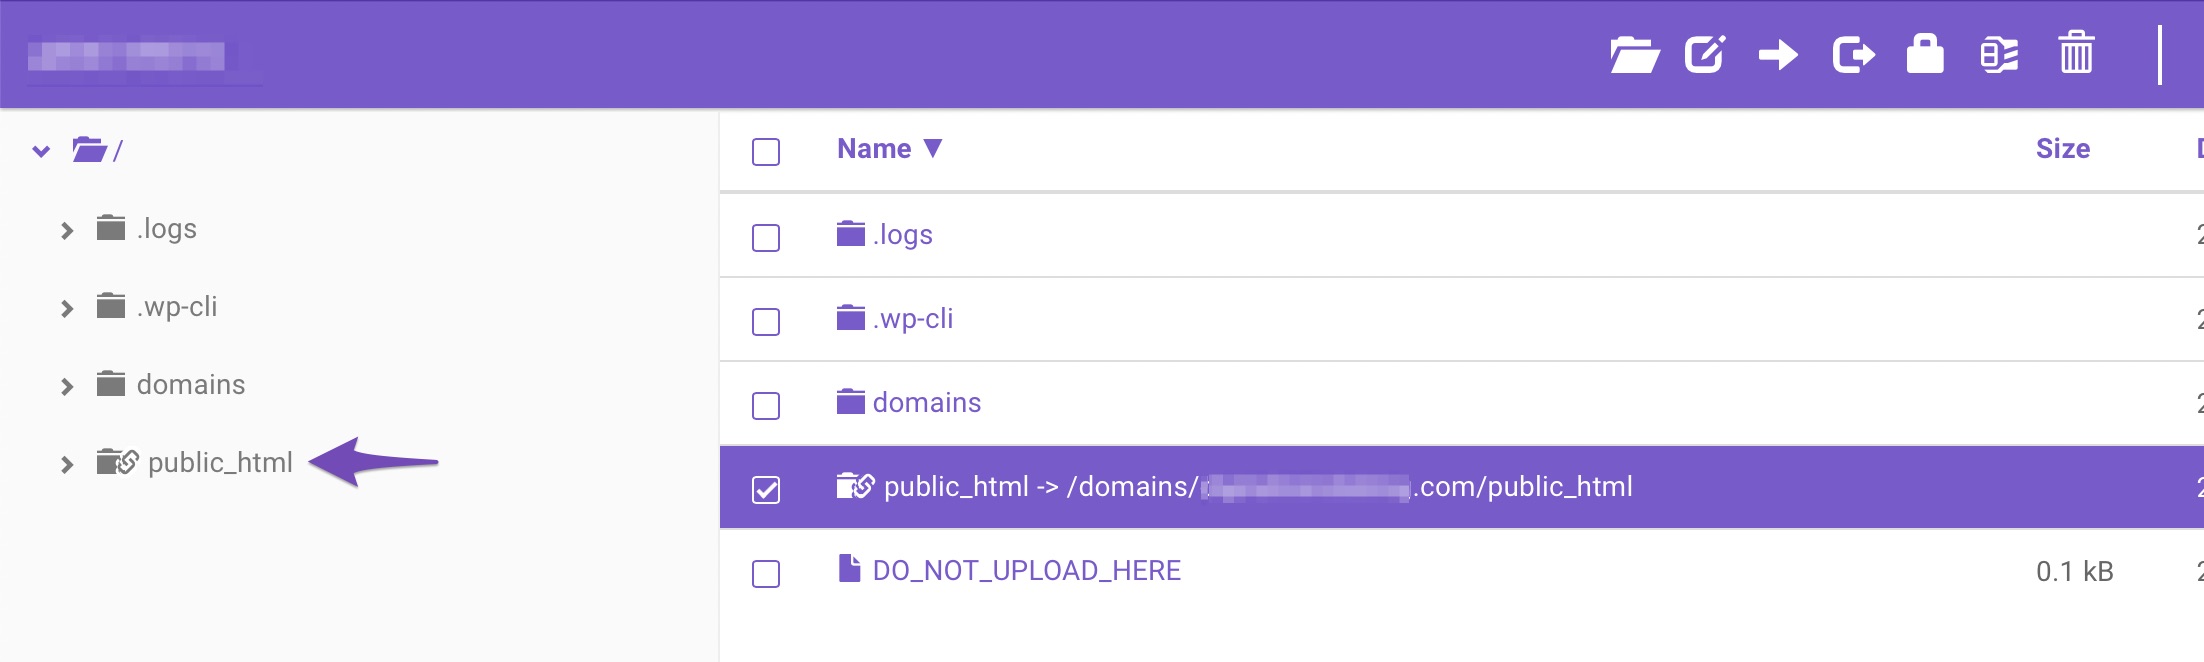
First, you want to log in to your cPanel. Once the relationship is set up, navigate to File Manager and click on the community_html folder.
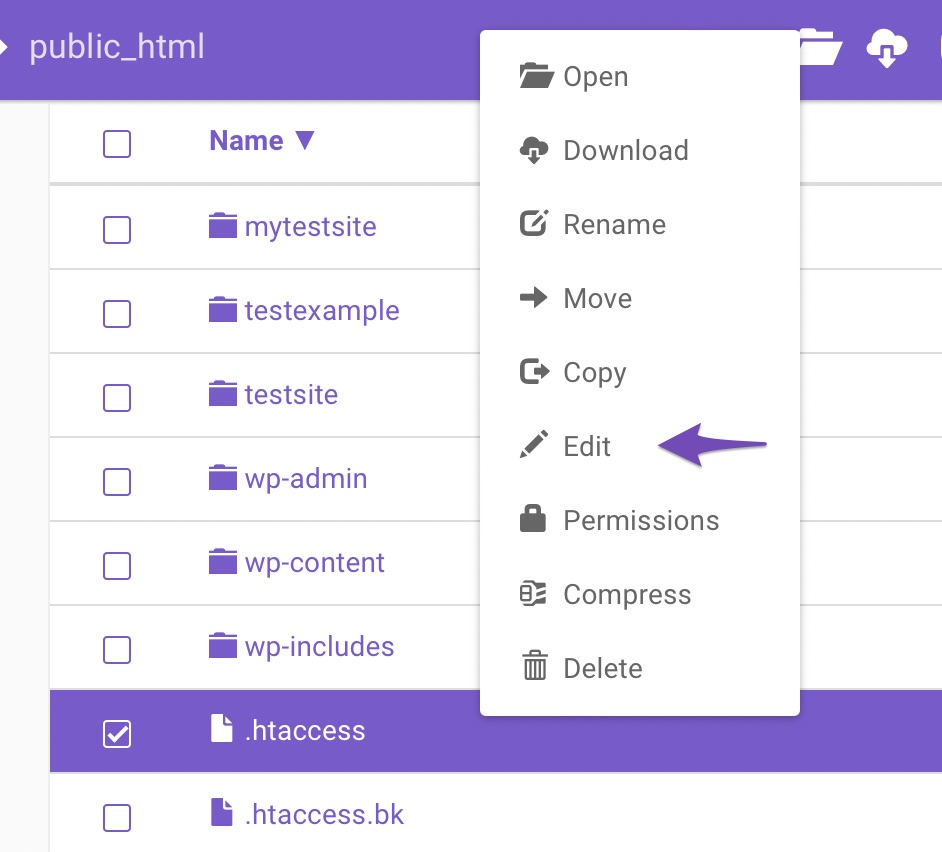
After you have entered the folder, search for the .htaccess file. If you however just can’t discover it, make positive the hidden information choice is established to exhibit.
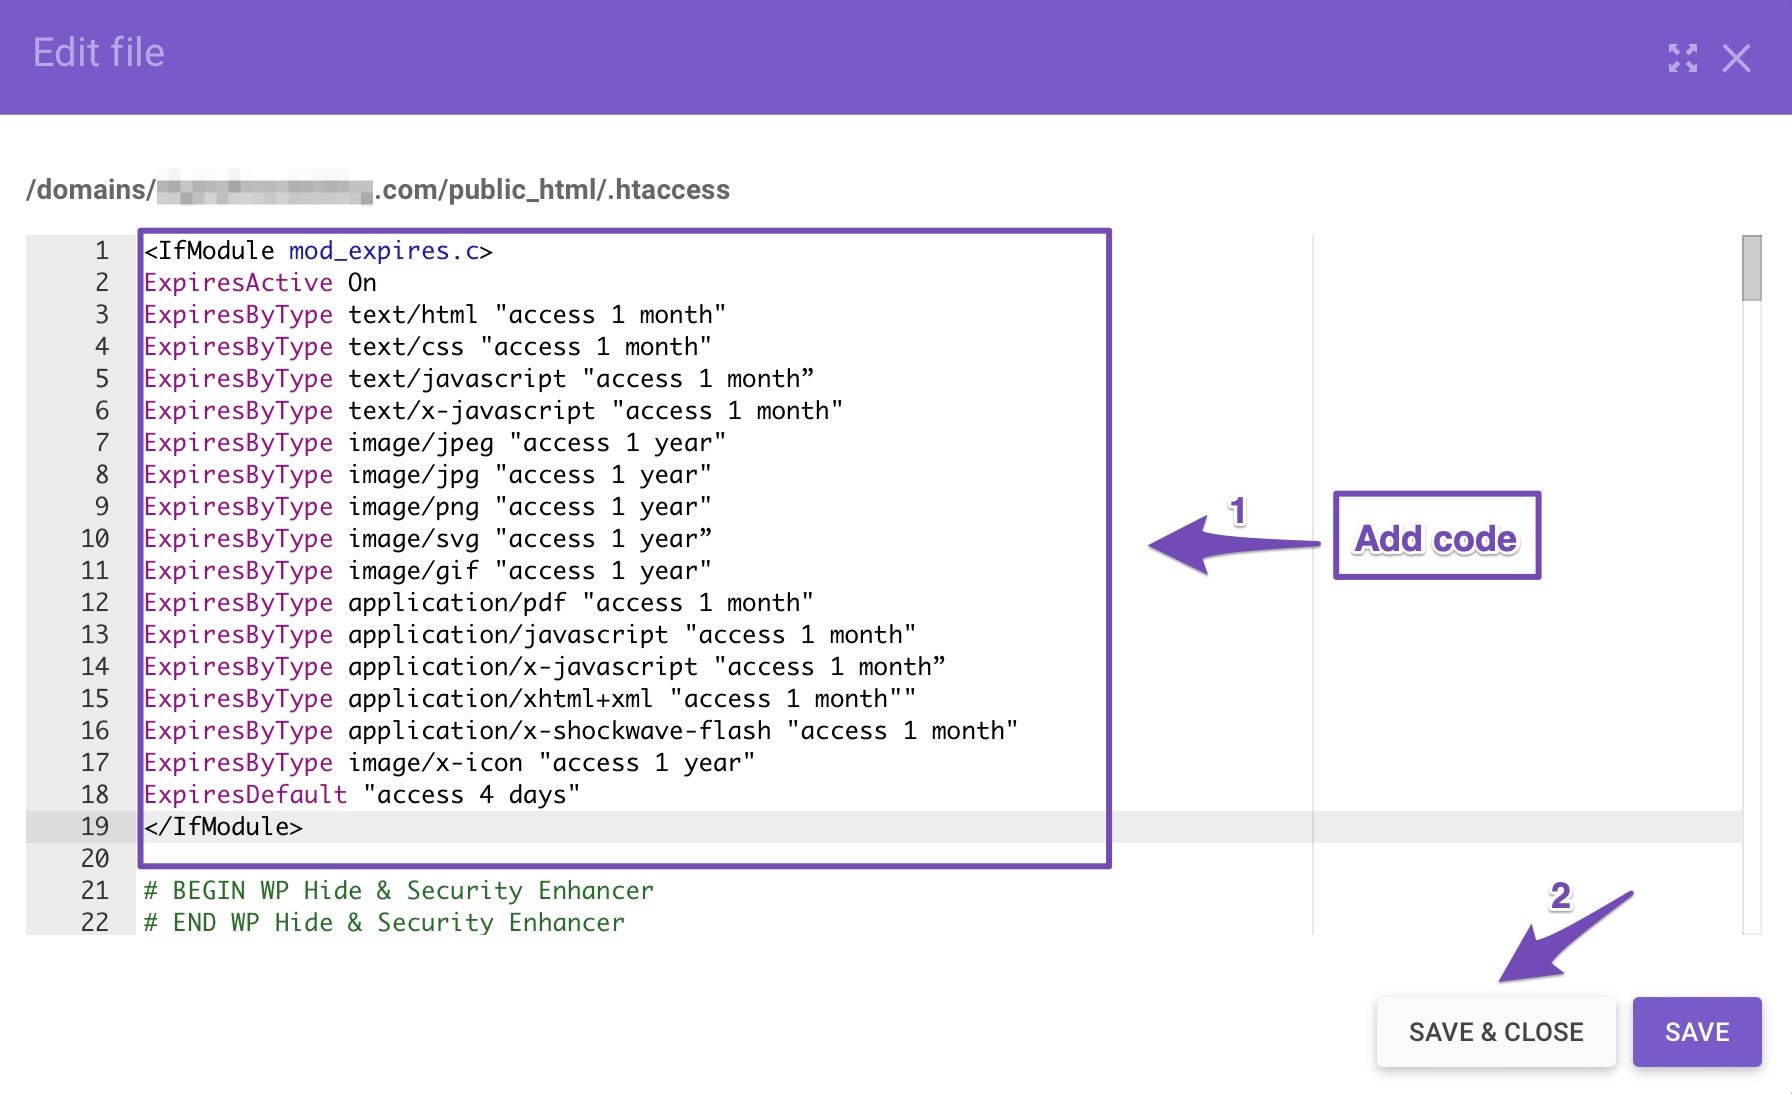
Now, increase the subsequent code and put it close to the top rated of your .htaccess file to incorporate expire headers.
ExpiresActive On
ExpiresByType text/html "entry 1 month"
ExpiresByType textual content/css "accessibility 1 thirty day period"
ExpiresByType text/javascript "access 1 month”
ExpiresByType text/x-javascript "accessibility 1 month"
ExpiresByType impression/jpeg "access 1 year"
ExpiresByType picture/jpg "entry 1 12 months"
ExpiresByType image/png "obtain 1 year"
ExpiresByType picture/svg "access 1 year”
ExpiresByType picture/gif "accessibility 1 year"
ExpiresByType application/pdf "accessibility 1 month"
ExpiresByType software/javascript "accessibility 1 month"
ExpiresByType software/x-javascript "obtain 1 month”
ExpiresByType software/xhtml+xml "accessibility 1 thirty day period""
ExpiresByType application/x-shockwave-flash "accessibility 1 thirty day period"
ExpiresByType picture/x-icon "obtain 1 12 months"
ExpiresDefault "obtain 4 times"
As you can see, the earlier mentioned code implements expires headers for a variety of useful resource styles, together with photographs, video, CSS, JavaSCript, and extra. The several file formats have different expiration dates. You can customise these and the ExpiresDefault header to very best accommodate your requires.
2.3 Insert Expires Headers On A Nginx Server
NGINX is not the same as the Apache world-wide-web server. That is why you will be not able to find the .htaccess file. So, how do you contain expires headers in NGINX?
You will want to edit your server’s configuration file. How you access and edit this file differs by the host – you can normally attain out to your host’s aid group for any support.
Next, insert the subsequent code snippet to your server block.
locale ~* .(jpg|jpeg|gif|png)$
   expires 365d


area ~* .(pdf|css|html|js|swf)$
   expires 2d
You can regulate the expiration occasions for different types of data files as for every your need. The moment you’ve made these improvements, preserve your configuration file and restart Nginx.
Summary
Expires headers plainly enhance website loading functionality. Even while it will not significantly improve your site’s velocity, the system will undoubtedly improve the person working experience.
You can use expires headers to deal with how distinct file kinds are cached and served to your people. They can help enhance load situations for frequent visitors although also making certain that they only look at fresh written content. That’s why they’re critical to web-site efficiency and overall consumer gratification.
With that stated, it’s significant to fully grasp how to apply expires headers properly. It will sluggish down your web page if you do it improperly. This is particularly accurate for additional dynamic and performing internet sites, these kinds of as eCommerce internet sites.
We hope this put up effectively armed you with the knowledge to incorporate expires headers to your site. if you like this publish permit us know by Tweeting @rankmathseo. 💬
